Best Bullet Blenders in India (November 2020)

Gone are the days when women were confined to the four walls and had a pile of additional responsibilities burdened on their shoulders.

Cooking a meal and serving the family isn’t child’s play. With workload and personal aspirations, it’s quite challenging to manage household chores and responsibilities.

There were times when the women of the house could be seen sweating profusely while using the mortar and pestle.
Top-Bullet-Blenders-India

They would get completely drained out as it was strenuous and time-consuming. But now, as technology makes its grasp firm over our lives, there are innovations that make work easier.

The bullet blender is one such appliance, which makes this once tiresome job of grinding, blending and pureeing, quite easy.

It helps the women to save time doing chores and put it to their own use and can be operated by men as well (yet another way to impress her).

Moreover, it reduces the energy required and makes the work comfortable. But with a wide range of choices available, it can be confusing to find the right one.

But again, no worries, for we are here to help you out with that. Here, we have reviewed the Top 5 Best Bullet Blenders in India to help you make the right selection.

Without further delay, let’s get to the main point. Here’s the list of the best bullet blenders in India.

Best Bullet Blenders in India in 2020

1. Nutribullet PRO Bullet Blender/ Smoothie Maker

Nutri bullet is a renowned name in the field of bullet blenders. You must have come across commercials or displays featuring products of this brand. They offer a variety of products having various features and fitting into different budgets.

This bullet blender, with its high-performance capability, it is suitable for daily use. You might get addicted to it, owing to its sleek design!  It is quite quick and easy to use and even easier to clean.Primary Features

  • Compact
  • 900 Watts power supply
  • Simple yet classy design
  • Easy to use and Clean
  • Quick nutrient extractor
  • Different sets of blades for different purposes
  • 2 year warranty
  • Vibration free technology

You can get the job done in no time. And after that, just take off the blades by twisting them and rinse them thoroughly to clean it. The powerful motor and the stainless steel blades can blend whole fruits and vegetables and extract the nutrition that you need.

Due to its compact size, it can be easily stored and placed at a convenient spot and is portable. It also offers membership to a site which has many healthy Smoothie recipes. This 12 piece set has a metallic body and silicon feet which enhance its look.

It also has a strong rotate gear and a large cooling fan. The vibration-free technology keeps the noise away and helps you to focus on work while your smoothie is being prepared.

It is durable and doesn’t create a mess. Also, it helps you minimize wastage by squeezing the most out of the pulp and fibres.

It also offers a 2 year warranty period, which means that if your blender doesn’t function properly within this time period (which is very unlikely to happen), it would be fixed for free, without you having to worry about the hassle!Pros

  • Compact, portable
  • Easy to clean
  • Powerful motor for quick and efficient performance
  • Vibration free

Cons

  • A bit expensive (but is worth the money paid)

2. Balzano Bullet High-Speed Blender/ Smoothie Maker

Over the last 110 years, Balzano has evolved as a quality brand all over the world. It offers a wide range of products, one of which is this bullet blender which works as an amazing Smoothie Maker. Concerned about your health? Are you Nutrition-freak?

But don’t have the time to indulge in a properly balanced meal? Then this Balzano blender is what you need. The pure copper motor blends the ingredients and reduces seeds, pulps, and fibres to a silky smooth drink with all the important vitamins, minerals, and other nutrients provided to your body in an easily absorbable form.Primary Features

  • Strong and noiseless motor
  • BPA free blender jars
  • Easy to clean
  • 10 piece set
  • 1 year warranty + extended 6 months
  • Easy to clean
  • Quick and easy to operate
  • Two different blades for chopping and blending respectively
  • Auto cutoff
  • Efficient nutrient extractor

It is quick and portable allowing you to take a sip of nutrition wherever you want. The durable cups with flip on lids allow you to drink from the jar itself (like those nostalgic childhood days)! The vibration-free body of aluminum lets you satiate your cravings for a Smoothie while at peace. 

No more of those loud noises, this blender is a must for house-holds where there are babies. (Because your baby needs to sleep undis-turbed for you to remain undisturbed!)

It is easy to use and incorporated with the latest technologies. It can mix, blend, chop, whip, and can perform many other operations in a simple way, without needing a dozen buttons or manuals.

Having stainless steel blades, this bullet blender is compact and occu-pies less space. It has a stylish finish and prevents spillage while in use. It is made up of tritan food-grade material, which takes care of your health.

The intelligent auto cutoff feature helps minimize the risk of motor failures. This product comes with 12 months of warranty along with 6 months additional warranty. To grab this amazing deal, click the button given below.Pros

  • BPA free
  • Powerful motor
  • Low noise
  • Auto cut off
  • Stylish finishing
  • Heavy discounts

Cons

  • Blades may get heated occasionally

3. Wonderchef Nutri-Blend Mixer Grinder with 2 Jars

Wonderchef is again a famous name, especially due to its pocket-friendly offers. This blender from Wonderchef, following the tradition, has quite an affordable price, along with some amazing features.

The blender with its unbreakable polycarbonate jars allows you to watch your ingredients as they get blended/grinded. Hence, it lets you take control of the texture. You will get 2 jars, the big jar comes with a capacity of 500ml and the small jar comes with a capacity of 300ml.Primary Features

  • 400 Watts motor
  • Durable
  • Separate mixing and grinding jars
  • Distinctive sharp blades
  • Great speed of 22000 rpm
  • Unbreakable poly-carbonate jars

It comes with a power of 280 watts, which would let you prepare your smoothie in no time. Also, they reduce your stress about mishandling them or eventually leading to damage, because they are hard to break.

It is durable and its speed of 22000 rpm allows you to extract the nutrition that you need, from all those fruits and vegetables.

It also offers a complimentary recipe book with delicious yet healthy recipes suggested by Masterchef Sanjeev Kapoor, which can be easily prepared using this blender.

The super sharp stainless steel blades deliver powerful performance and help you achieve the fine-ness you seek. They are easy to clean and extract the required micronutrients.

It is easy to use with no buttons, switches, or regulators. Moreover, you need not hold the machine while it is being used! So just twist and let it do its job. It also offers a wide range of colour options to choose from.

It has a stylish finish which enhances the look of your kitchen. The machine is easy to clean and maintain and prevents any leakage thus protecting the motor.

It comes with extra lids and seasoning caps and provides a reliable service. It is compact and the best part is that, inspite of all these features, it is quite pocket friendly.

You will get 2 years warranty on this appliance which helps it to stand out of the crowd. Also, there is a massive discount of over 40% available on this bullet blender, which can be availed by clicking the button given below.Pros

  • Unbreakable jars
  • Easy to clean and use
  • Many colour options available
  • Affordable price

Cons

  • Not suitable for tough grinding like that of turmeric
  • During first few usages, there may be a burning smell due to motor being varnish coated

4. Balzano High-Speed Nutri Blender/ Smoothie Maker

Another product from Balzano. Why not? When the brand is renowned all over, it is quite expected to have more than one of its appliances on this list. So, let’s see its features and how it is different from the one mentioned above.

The pure copper motor blends the ingredients and reduces seeds, pulps, and fibres to a silky smooth drink with all the important vitamins, minerals, and other nutrients provided to your body in an easily absorbable form (Quite similar to the one above).Primary Features

  • Universal blade
  • BPA free Tritan jar
  • A set of 9 pieces
  • Commercial grade motor
  • Overload protection
  • 2 years warranty (+ 1 year extended)
  • 1200 watt RAW power
  • One touch push buttons

The unique feature is its hardened universal blade. This blade has been specially designed to suit all purposes like blending, mixing, nutrient extraction, or grinding, without having to change blades for the same. The commercial-grade motor ensures fast and powerful performance. 

The intelligent motor gives adequate speed and power as per your needs. Switch between your requirements with the push of a button. The blender’s one-touch push buttons lets you switch between the three modes quite easily.

A special pulse function is also added to suit Indian cooking requirements. The leak-proof BPA free Tritan jars can be used for storage as well.

They won’t crack or dent and are also travel friendly and can be used to carry your nutritious drink on your way to the office/gym/wherever you want.

It is quick and easy to use. It can also be used to prepare baby food within a few seconds. Though compact in size, the commercial-grade components help grind the hardest ingredients within a short time.

It prevents spillage and has an attractive finish. Moreover, it has an affordable price which won’t disturb your monthly budget.

It has an intelligent speed sensor and gives precise rpm. For the blades to spin, the jar and cap need to be securely in place, thus ensuring double safety. The parts are detachable, washable, and dishwasher safe. Thus it is quick to clean and easy to use.Pros

  • BPA free
  • Overload protection
  • Powerful motor
  • Universal blade
  • Stylish
  • One touch push buttons
  • Double safety interlock system

Cons

  • During first few usages, there may be a burning smell due to motor being varnish coated

5. Inalsa Nutri Blender Vito Blender

When it comes to home appliances, most Indian customers have Inalsa in their minds. This blender is quite versatile and is easy to use with the controls for variable speeds and the pulse function available.

It reduces everything, including pulp and fibers, into that creamy-textured drink you’d love. It also helps make those chilled desserts so easily and quickly. The powerful motor works efficiently, consume less electricity, and is durable.Primary Features

  • Pure copper winding motor
  • 1000 watt Power
  • Auto cut off
  • Negligible noise
  • Separate buttons for speed regulation (low/high) and pulse function
  • 6 Leaf Stainless Steel blades
  • Wave action system
  • BPA free Tritan blender jars
  • Durable blade shaft

It has a special auto cut-off feature that cuts the supply in case the blades get overheated due to use. This makes it safe and reliable. The speed regulator allows you to get the desired texture, which is lump free and fine or coarse, as required.

The buttons provided make it easy to choose the required option and thus make it convenient. Its compact size makes it easy to store.

The stainless steel blades, the sealed ball bearing, and the BPA Free Unbreakable jars, make blending a safe experience.

It also makes very little noise while operating thus ensuring a smooth experience. The sipper lid is provided to store your drinks and carry them with you.

2-year warranty is also provided, which enables you to get your appliance fixed for free if it happens to function improperly. The wave action system keeps moisture consistent within the jar, in the blades while blending, and thus provides a smooth and even texture. It is suited for all-purpose dry or wet grinding.Pros

  • Auto cut off
  • Speed regulation and pulse function
  • Versatile and compact
  • Wave action system
  • Unbreakable BPA free Tritan blender jars

Cons

  • Doesn’t offer many colour options to choose from

Conclusion

So these are the best bullet blenders available in India in in november 2020. I hope you get a clear idea about what to buy according to your needs. If you have more work with blending and all then i suggest go for a countertop blender.

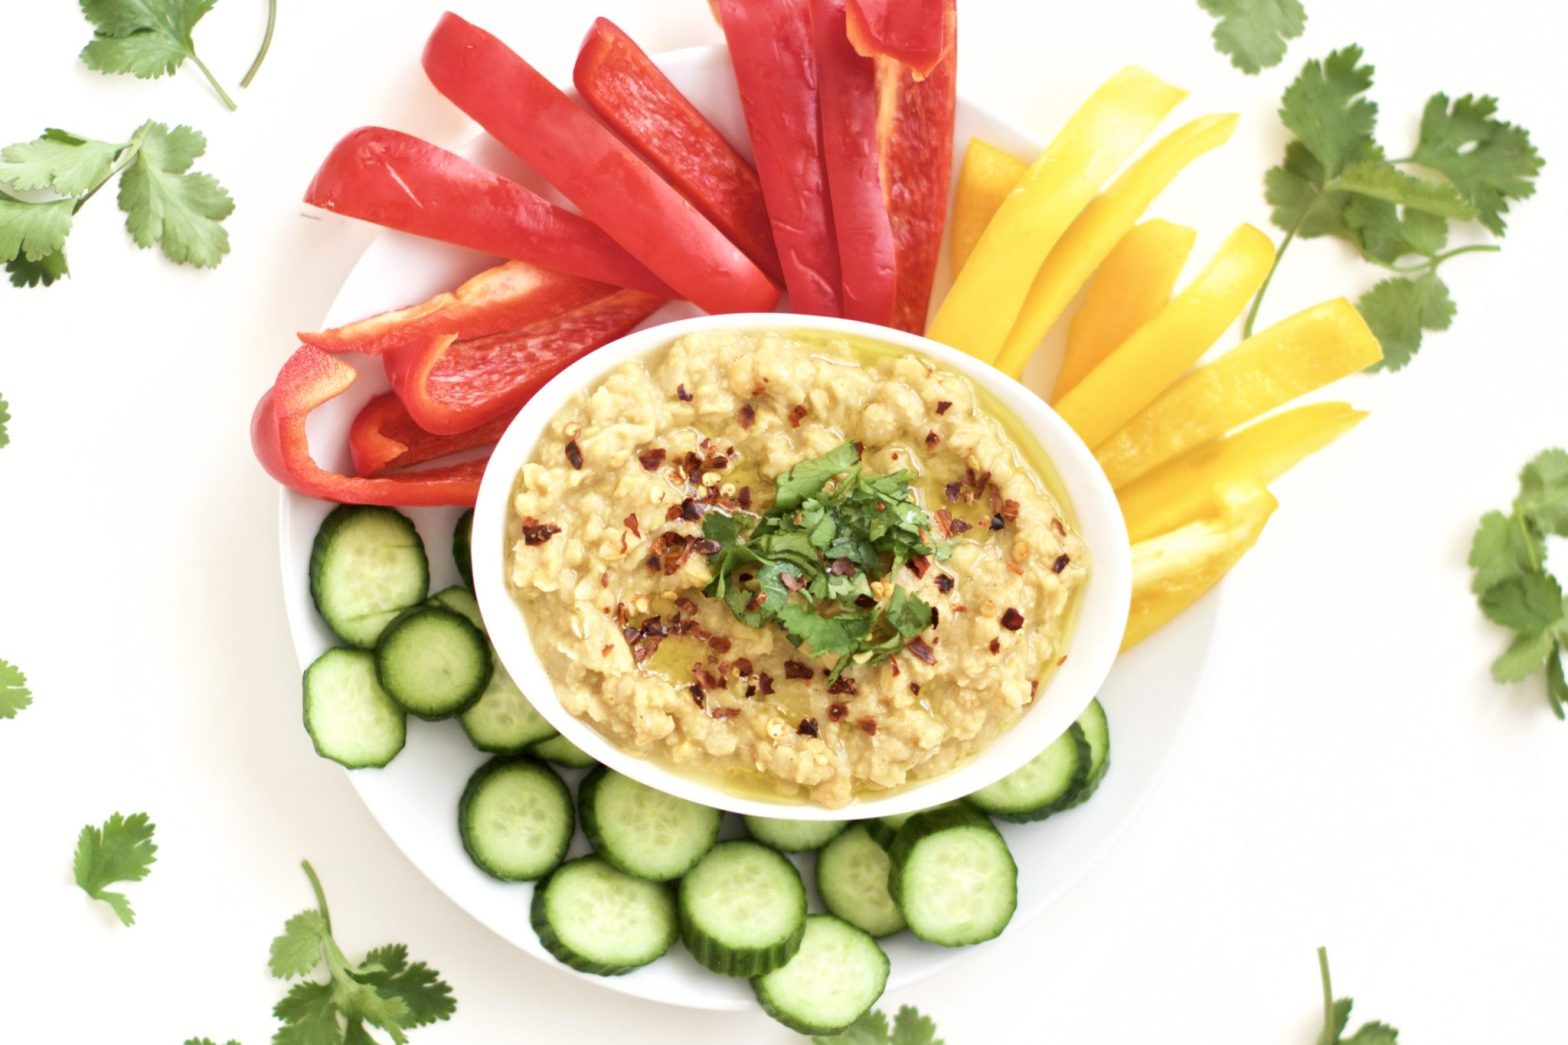
Different Ways to Make Hummus Without a Food Processor

What makes you fall in love with a delicacy, is it the delicious taste or the aroma? Well, most people would agree that it’s the aroma of the delicacy that allures you to taste it!
In fact, some would say it is the presentation of the food that’s more enticing than its aroma. Well, whatever be your reason, you will end up relishing the food only when it has a delicious taste.

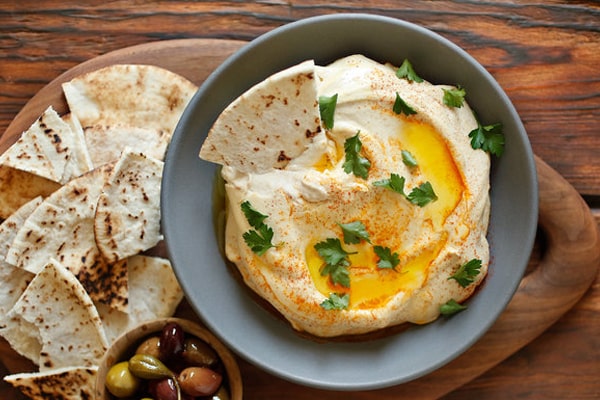
Hummus is a dip, which hails from the Levantine cuisine of the Middle East and Mediterranean region. It is also known as ḥummuṣ bi-ṭaḥini in Arabic. Made with the goodness of soaked chickpeas, tahini, olive oil, lemon juice, salt along with a hint of garlic. This delicacy is used as a dip or spread along with flatbread, meat chunks, veggies to name a few.

It is easy to make it using food processor but what if you don’t have one.

So, tiny kitchen and college dorm dwellers, don’t fret. Using a food processor does result in a creamier mix, but without one, you’ll have a thicker, chunkier hummus that will still be bursting with flavor.

Ingredients to Make Hummus Without a Food Processor

This is just a basic hummus recipe. The great thing about hummus is that it is so versatile. You can add in a wide variety of spices or vegetables and it will only add to the flavor. Start with a good base and add what you like!

  • 1 16 oz can of chickpeas or garbanzo beans
  • 1/4 cup liquid from a can of chickpeas
  • 3-5 tablespoons lemon juice (depending on taste)
  • 1 1/2 tablespoons tahini (sesame paste)
  • 2 cloves garlic, peeled and crushed
  • 1/2 teaspoon salt
  • 2 tablespoons olive oil

Using a Blender

blender is going to be the next best thing to a electric food processor. Put all ingredients in a blender and blend. Just remember to put in your thicker ingredients first, like the chickpeas and tahini. Otherwise, your blender, unless you have a commercial-grade version, might have trouble thoroughly blending everything.

Mortar and Pestle

Using a mortar and pestle is the “old school” way of making hummus, but works. Just be prepared to put a little elbow grease into it! For those unfamiliar, a mortar and pestle are two bowls (mortar) and bat (pestle) shaped objects used to pulverize foods, such as seeds, herbs, and spice.

Microwave

Yes, you can microwave your hummus. Microwaving makes chickpeas easier to mash with a fork. Before mixing the ingredients, place the chickpeas in a microwave-safe bowl and heat them for about 30 seconds. Drain, but keep the liquid because you may need it in case your hummus is too thick. After mashing, add the tahini and all the remaining ingredients. If it’s still too thick, add one tablespoon of the drained chickpea liquid at a time until you’ve got the consistency you like.

If all else fails, you can always buy a basic hummus at the grocery store and add the spices and vegetables you want. Popular hummus recipes include garlic, jalapeno peppers, and sundried tomatoes. But first, try making your own because you’ll definitely taste the freshness.

Blenders for Hummus (2020 Review)

Looking for the Blender machine for Hummus?

I don’t blame you. Hummus is a delicious, protein rich, and vegan-friendly food that can be spiced and flavored into dozens of different varieties, right from the comfort of your home kitchen.

It’s relatively easy to make, and it’s a great replacement for fat-heavy dips that don’t offer a lot in the way of nutritional value.

Making hummus is something of an art, and I’ve found that everyone likes their hummus a slightly different texture, and has their own flavor preferences.

At the same time it’s one of the few foods that people can be so particular about, and yet always get excited when someone offers them a bowl of freshly made hummus.  

This versatile little dish is a great snack, a great appetizer, and works just as well for relaxed family meals as fancy business dinners. Not to mention, hummus is a healthy snack too. 

Truth is, I’m not here to teach you how to make hummus, I’m here to make sure you have the right tools to get the job done. While many people make their hummus in a food processor, blenders work just as well, and can actually give you a smoother and creamier texture if you know what you’re doing. 

While most blenders will work to make hummus, the job is a lot easier, and the results a lot tastier, if you have a blender that’s really up to the job. So, I’ve looked at 5 of the best blenders for making hummus, and put together a short guide to finding the right blender to help you make sure you have the right fit. 

In this guide, you’ll learn

  • What qualities your blender needs to create great hummus
  • Which features and benefits make a more effective and durable blender
  • And much more!

What are the Advantages of a High Quality Blender for Hummus? 

Never made hummus before? Don’t worry, I’ve got you covered. This video gives you a great starter recipe for making your own hummus and shows how to make your hummus in the blender.

A lot of people think that hummus is a relatively low-demand food to create, especially since the texture isn’t that much thicker than a lot of smoothies and even some thicker blended soups. However, the nature of the ingredients that go into hummus, especially tahini and chickpeas, makes this a high-power, high-demand food. 

While cheaper blenders can probably make hummus, they won’t last as long doing it.  Where a high-quality blender will handle making dozens of batches of hummus, along with everything else you use it for, no problem, blenders that aren’t designed for the stress will quickly short out and stop working. 

High quality blenders also tend to have a better design profile that helps the ingredients mix and blend more evenly. Other blenders spend less time on this important detail, since hiring the designers and engineers to create a truly effective blender jar isn’t very cost effective for a cheaper appliance. 

That means that high quality blenders take less time to blend your hummus, and produce smoother more even results. That becomes more important the more you start to cook at home and use your blender to prepare more and more food. 

The less time you have to spend on any one thing, the more time you have to spend with your family or picking the perfect ingredients and recipes for your next big gathering. 

High quality blenders also tend to be quieter, and to come with higher quality blades. Better blades mean better results and fewer calls for a replacement when the blade starts to wear out. Better blades also contribute to your blender being quieter since they aren’t stressing the ingredients (or the motor) as much as you blend.

Quiet is hugely important with a blender, especially if you live in a home with roommates, or if your kitchen is near a bedroom. The noise from a blender can be incredibly disruptive, so keeping it a little quieter can make your cooking adventures much less bothersome to the rest of your house.

How to Pick the Best Blender for Hummus?

Picking the best blender for hummus can be quite tricky because there are a lot to choose from. There are several things to consider when picking a blender such as: power, speed, size, jar material, warranty, and design.

Power: How Much Power do I Need?

Hummus is a relatively high demand food for your blender. You’re taking tough chickpeas and turning them into a paste afterall. The smaller you can get the food particles in your hummus, the creamier it will become. 

As a general rule, you’ll need a beefier blender to make really great hummus. The low-end of power needed for hummus is about 500 watts, which is more powerful than most grocery store brands will deliver. 

More power is better, with the best blenders offering 1,000 watt+ motors that will power through just about anything you throw at them. 

Keep in mind that hummus isn’t the only thing you’re likely to make in your blender, and more powerful motors also help with crushing ice and other common blender tasks. 

Speed: How Many Speed Settings do I Need?

Fortunately for hummus you don’t really need a ton of specialty speeds. You can make wonderful hummus with a basic speed range that include low, medium, and high speed settings along with a pulse setting. 

But, if your blender has a setting for making soft serve ice cream, purees, or other creamy foods, that will be useful as well. 

Ultimately, when it comes to hummus it’s less about which speeds your blender has than how you use them. Feel free to experiment with different settings and blending times until you get a final texture you really love. 

Size: What Jar Size am I Looking For?

I prefer to make hummus in fairly large batches. It’s a useful and versatile food to have on hand, and I don’t mind eating the same flavor for a few days until I run out and need to make a new batch. 

With that in mind, I recommend looking for a blender with a fairly large jar. There are two reasons for that. For one thing, you want to be able to make a reasonable amount of hummus in one batch. The other reason is that the ingredients for hummus take up more space than the finished product, so you need more volume in the jar than you want in finished hummus. 

I would go no smaller than a 4 cup jar, and 6 cups or more will work much better. 

Jar Material: Which Material Works Best?

In general, glass blender jars are the most effective. They resist food odors, which means that you won’t find flavors mixing in your blender just because you happened to make garlic sauce in the jar six months ago. 

However, glass jars tend to be more expensive, and popular and highly effective designs like the Ninja blender use a plastic jar. Plastic works, but you’ll need to make sure you clean out the jar quickly anytime you’re adding stronger flavors to your hummus. 

If you opt for glass, make sure the jar is made from pyrex glass. Pyrex resists thermal shock, which means that you can use hot and cold items in the blender safely. Other glass jars might crack, or even shatter, if you add an ingredient that’s too hot in the jar. 

Warranty: What Sort of Warranty Should my Blender Have?

Blenders are one of relatively few appliances that you really want to check the warranty before you take them home. That’s because minor defects in the motor or jar can lead to major failures while using the blender. 

All the blenders I’ve selected are high quality enough that you shouldn’t have to worry about major defects or other problems out of the box, but even the best manufacturers will miss the occasional lemon product. 

With that in mind, I recommend looking for a 1 year warranty at minimum, and longer warranties are better. Also make sure that both the jar and the blender base are covered by the warranty. 

Blender warranties are almost guaranteed to be limited warranties, which means that they won’t cover damage from dropping the blender jar and other incidental problems that have nothing to do with the manufacturer. But the warranty should be fairly broad when it comes to manufacturer problems, electrical shorts, jamming, and other problems that aren’t related to damage or user error. 

Design: What Look am I Going For?

This is largely up to you in terms of aesthetics. But, I prefer blenders with a reasonably tall jar. Round jars work better if the blade of the blender is at the bottom, since they encourage free movement in the jar. 

You should also look for a sturdy handle on the side of the jar, and an easy pour spout at the top. The spout should also be designed so that it isn’t too difficult to access and clean, with as few harsh corners as possible. 

5 Ways You’re Cleaning Your Blender Wrong

There are a lot of dirty blenders out there, but your blender doesn’t have to be one of them. Leftover food particles in your blender jar can contaminate everything you make with it.

At best you’ll likely notice that your blender develops its own taste, and contributes that taste to everything you make with it. However, you can even risk food poisoning or worse when your blender jar isn’t cleaned properly.

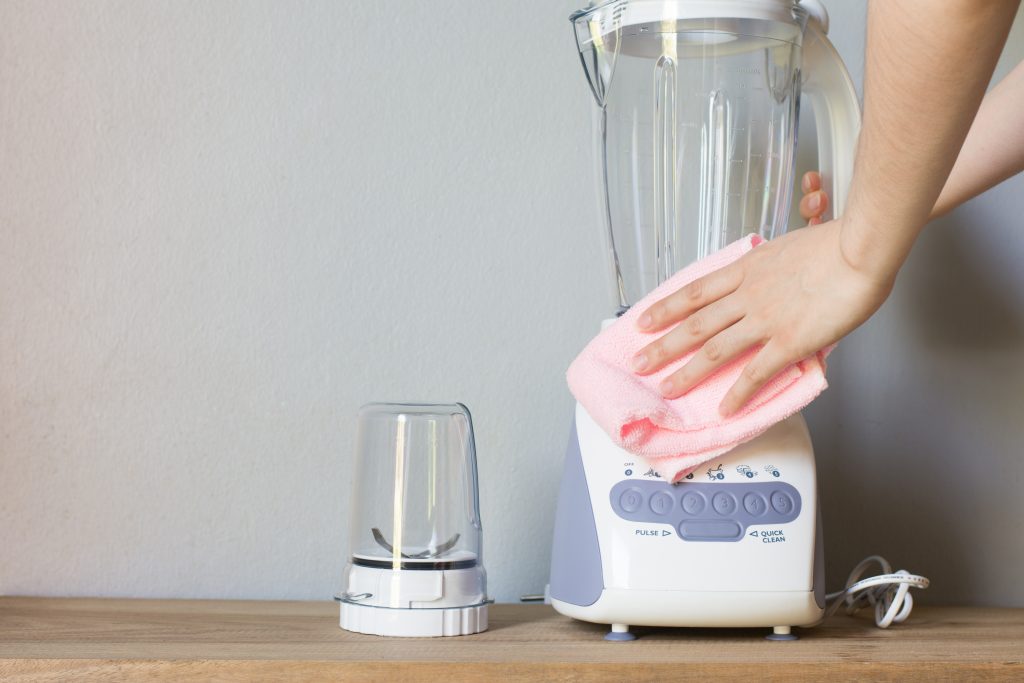
Your blender base is just as important as the blender jar. Small food particles and other contaminants from your kitchen collect on your blender base over time. While those contaminants might not make it into the food in your blender, they’ll still spread germs and bacteria over your counter.

Properly cleaning your blender helps make sure your whole kitchen is clean. It also keeps you and your family safer whether you use your blender everyday or only a few times a year.

5 Ways You’re Cleaning Your Blender Wrong

Don’t worry. Cleaning your blender properly won’t take much more time or effort than the methods you’re probably using already. Make a few small adjustments and you’ll be well on your way to a cleaner, healthier blender.

5 common mistakes in how you’re cleaning your blender wrong:

1: You Rely on the ‘Self-Clean’ Setting

A lot of blenders have their own self-cleaning settings these days. Blending in self-clean mode almost always involves several minutes of blending with soap and hot water. Some may even heat the water for you!

The blender self-cleaning setting is a great option to save time. But while this setting makes it simple to clean your blender between uses, it isn’t enough to thoroughly clean your blender every time.

This is the common trap people fall into, thinking that using the self-cleaning setting will be enough to keep their blender clean. In fact, the self-cleaning setting of most blenders have several weaknesses.

First, most self-cleaning modes just don’t run long enough to properly sanitize.

As a result, the bottom of your blender jar will be cleaner than the top. That’s because it takes a little while for the soap and water to foam enough to fill the whole blender jar.

Adding more water can help get the lid cleaner, except that it’s also likely to overflow your blender toward the end of the self-clean cycle as it foams up.

The self-clean mode often isn’t effective enough to clean the corners of the lid, or get food particles out of the seal between the lid and the jar. It also may not clean the bends and ridges in your blender jar either (even the ones designed to help mix liquids in the jar).

Soap doesn’t completely clean or sanitize surfaces immediately. As a result, the top of the jar can still have bacteria and germs that haven’t been sanitized properly, even if the jar looks clean.

Don’t get me wrong, the self-cleaning mode is a solid addition to your blender. But the self-clean mode is more of a maintenance clean than a deep clean. It’s not supposed to get all these details.

That’s why it’s so important to clean your blender with other methods as well.

Here are some other common problems with the self-clean setting in your blender:

  • May not remove sticky spots from sugary foods
  • Won’t remove scalded food at the bottom of heated blenders
  • Can easily overflow your blender if you add too much soap or water
  • Doesn’t clean the area under your blender blades (in models where the blade is detachable)
  • Can’t clean small areas inside the blender jar or lid effectively

How to improve:

Go ahead and continue using your blender’s self-clean mode if it has one. It’s a good option for quickly cleaning your blender.

However, you shouldn’t consider your blender’s cleaning mode a deep clean. Make sure to clean the blender jar with a regular sponge anytime there is stuck-on food, or any particles of food that your blender missed during the self-clean mode.

As an addition to using the self-clean mode, you should also make sure to wipe down the inside of the jar, the blender blades, and the lid every few uses.

2: You Don’t Clean the Blender Base Regularly

Your blender jar might do most of the work, but your blender base will still pick up food particles and other contaminants from the kitchen.

Bacteria and germs will collect on the base of your blender, feeding off any food particles or dust that’s allowed to collect. When your base sits on the counter, some of that bacteria will get on your counter, and from there it’ll get on everything on your counter.

That includes your food!

While you should definitely spend most of your cleaning attention on the jar, lid, blades, and blender accessories that came with your blender, the blender base needs some TLC from time to time as well.

Most people only wipe down the blender base when the blender overflows, or when the base is visibly dirty. That’s not nearly often enough.

How to improve:

If you rarely use your blender or keep it in a cabinet instead of on the counter, you should be cleaning the blender base before you use it. If you clean your blender base before using the blender you don’t need to worry about cleaning it after unless the blender overflowed.

If you’re like me and keep your blender on the counter and use it frequently, you’ll also need to keep your blender base more often.

Try to clean your blender base every week or so. Make cleaning your blender base part of your kitchen deep cleaning routine, and give it a wipe down with warm soapy water when you wash the counter.

Depending on where you keep your blender, you might want to clean your blender base even more often. If you keep your blender next to the stove, you should clean the base every time you cook with greasy foods.

Otherwise, grease splatters will accumulate on your blender base and eventually form a slick oily film over the plastic. Soap helps to cut through the grease and keeps your blender base good as new.

This video offers a pretty good summary of how to clean your blender, though I personally like to do a little more cleaning maintenance for my blender. Still, if you can adopt the habits recommended in this video (whether your blender is a Vitamix or another brand) you’ll be doing a lot better than most blender

3: You Don’t Let Soap Sit in Your Blender

Do you ever leave soapy water sitting in your blender for a good soak? If not, you’re missing out on a key opportunity to cut through biofilm buildup on the inside of your blender jar.

Cleaning your blender on a regular basis is key to making sure your blender stays clean. But regular cleaning won’t completely sanitize your blender jar, especially if you’re working with a lot of probiotic foods.

That’s because probiotic foods naturally encourage the growth of bacteria. Some, like yogurt, have thousands of live beneficial bacteria cultures. The problem is that when those bacteria stay inside your blender jar they can mix with food they aren’t supposed to.

Bacteria overgrowth, even beneficial bacteria, can cause problems. Especially when there are multiple kinds of bacteria. While most won’t cause illness on their own, lots of bacteria and microbes in your kitchen can mold and ferment your food.

When you leave bacterial colonies alone for too long they’re more likely to become harmful and even pathogenic. That’s why it’s important to get rid of biofilm on your blender (and other kitchen surfaces!) before the bacteria cause a problem.

Regular cleaning doesn’t cut it when it comes to this biofilm. Don’t reach for the rubbing alcohol or bleach, either. All you need is regular dish soap, warm water, and a little time.

How to improve:

Once a month, fill your blender jar up with water to the fill-line. Add a little soap and mix it in. Then let the soapy water sit for 5-10 minutes. Soaking your blender in soapy water helps sanitize your blender just like soaking can help clean your dishes. Skipping this step will make it harder to clean your blender as it gets older.

Dump the soapy water and finish up with a quick scrub, or by running your blender’s self-cleaning mode.

The soapy water can sanitize your blender given enough time. 10 minutes should do it, but you can leave it soaking up to 30 minutes if you need to do something else at the same time.

Completely filling your blender means more of the jar is sanitized during the soak because it soaks longer than it does when you use self-cleaning modes.

4: You Only Use Soap and Water to Clean Your Blender

So far I’ve talked a lot about how to clean your blender with soap and water, but I haven’t spent much time on other important tools you can use to keep your blender clean.

Soap is good for sanitizing your blender, cutting through grease, and lifting food particles off the sides of the blender jar.

But, if you’ve noticed a smell inside your blender jar, you’ll notice that soap and water isn’t very good at getting rid of the scent. I find this especially true when I’m using my blender for blending stronger flavors, like with Indian food. Soaking with soapy water can help, since some of the smell might be because of the biofilm I mentioned before.

Still, even after multiple soaks there’s usually still a lingering scent.

It’s time to use some additional tools to clean your blender more effectively.

How to improve:

Baking soda, vinegar, and lemon can all be used to help keep your blender cleaner, smelling fresher, and to help maintain the jar.

Baking soda is the best blender deodorizer out there. Mix a little baking soda in water, fill the blender, and let it soak for an hour. Drain your blender and then clean as normal.

Vinegar is another good option for deodorizing your blender. It’s also a good way to remove sticky spots on your blender jar, and to help clear cloudiness from your jar’s walls.

Wash the inside of your jar with a vinegar soaked sponge for the best results. You can also soak your blender jar with a vinegar and water mix. Let it soak for about 20 minutes before draining. If possible, remove your blender blades before soaking with vinegar.

Lastly, lemon juice is a good replacement for vinegar, but is a little milder. Add a small amount of lemon juice to enough water to fill your blender jar and let it soak for up to an hour. Alternatively you can use a lemon slice to scrub the sides of your blender jar to cut through stubborn sticky spots.

Cleaning with these ingredients is a great way to freshen up your blender. You should still wipe out your blender after using any of these ingredients so that no residues are left behind. This is another scenario where using the self-clean setting to help finish the job is a good idea.

5: You Don’t Hand Wash Your Blender’s Lid and Accessories

Your blender’s lid and other accessories are a huge part of how your blender operates. The lid prevents your blender from turning your kitchen into a sticky mess, while extra blades, a tamper, and other accessories make using your blender a lot easier and more effective.

However, like most blenders, these tools aren’t dishwasher safe. Self cleaning and quick-cleaning your blender generally isn’t enough to thoroughly clean your lid, much less your other blender accessories.

Sometimes a quick rinse is enough to clean off your blender accessories. It’s not enough in the long term though. Like everything else in your blender your blender accessories need a little more care an attention from time to time.

How to improve:

In addition to rinsing off your blender accessories every time you use them, it’s also important to give your accessories a more thorough wash.

Soap and water is generally enough, but you need to make sure you get the sponge into all the nooks and crannies of your blender lid, and any other accessories.

Your blender tamper is usually the easiest to clean, but don’t neglect your blender lid and additional blades just because they take a little longer.

Best Blender for Indian Cooking in USA

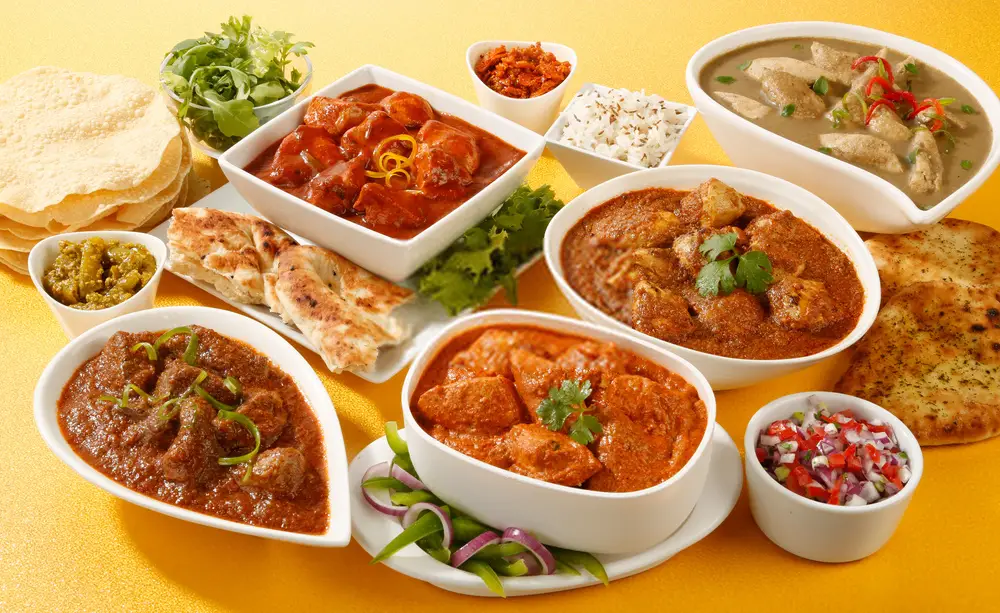
Unlike the western dishes which are mainly cooked and baked, Indian dishes are made with a lot of different spices. Indian culinary is complicated and requires various pre-made spices on the day.

There are so many different spice mixes and sauces for a delicious Indian dish. However, this can be a problem if you’re not in India because you can hardly find these unique spices anywhere else in the world. Hence, the best way to solve this problem is to let a blender help you with South Indian cuisine.

Indian people throughout history had to use stones to grind spices and make a paste, yet they have come up with innovative ways to simplify their jobs. A blender is amongst the most popular appliances in an Indian home since it is impossible to finish a dish without it, giving the Indian taste to the whole food.

It seems that any blender will have its own characteristics and its own advantages and disadvantages. Below are 9 best blenders for Indian cooking which are ideal for seasoning grinding, chutney making, dosing, and many others in Indian cuisine.

Best Blender for Indian Cooking in USA

1. Ninja Professional Countertop Blender (More than 6,700 ratings)

Ninja Professional Blender with Nutri Ninja Cups has will be a very suitable choice for your kitchen with its various great functions. The blender has professional performance power of 1100 watts with 3 speeds, pulse as well as single-serve functions.

Also, if you are wondering whether Ninja Professional Countertop is able to serve the whole family, then the answer is yes because the 72-ounce crushing pitcher can totally do the task.

In addition, with 2 16-Ounce Nutri Ninja Cups featured with Go Lids, it is super perfect and convenient for you to create nutrient-rich drinks and bring it to work or your gym. Another good news for you is that the pitcher and 2 cups are all BPA free, so don’t worry to keep your food and drinks in them.

The six-blade design paired with the powerful engine of the Ninja promises extremely fast mixing. A number of customers have confirmed that combining different components, like fruits and vegetables, can be done in seconds.

The relatively powerful engine and many sharp blades make it as fast as 10-20 seconds to blend a smoothie. You can take 30-50 seconds when you are using ice, frozen materials, or tough substances, for example, carrots or celery.

PROS

  • Affordable price
  • Six-blade system
  • Powerful engine

CONS

  • Relatively loud noise

If you are looking for a food processor that can crush and blend ingredients quickly to make delicious Indian food like dosa batter, Ninja Professional Countertop Blender is one of the great choices for you. Click here to check price

2. NutriBullet Pro – 13-Piece High-Speed Blender (More than 3,200 ratings)

A lightweight and compact blender that can blend all sorts of superfood, herbs, fruit, and protein shake to produce a smooth shape, the 12-piece NutriBullet high-speed blender is.

You can make smoothies, icy beverages, shakes, nut milk, the whole juices, cool dips for your Indian food, and sauces with the Nutribullet Pro 900.

The size and ability to handle small quantities of ingredients make it most suitable for personal use. The NutriBullet provides a good smoothie through its cyclonic and patented blade design which can extract every kind of nutrient from any food.

Another thing that makes many customers choose this one is that is can be both wet and dry grinders. This blender is mobile and safe even for children. These features make NutriBullet Pro – 13-Piece High-Speed Blender become popular among shoppers.

When mixing and grinding dry foods like coffee and spices, a lot of customers posted positive results. There are some great YouTube videos showing how the Pro 900 treats dry ingredients.

The blender consists of two blades (the emulsifying and flat one): three pitchers and one power base. Also, this one is very popular for its effective system, easy to clean and substantially more fruit and vegetable yields are produced.

PROS

  • Ease of use
  • Lightweight
  • Affordable price

CONS

  • Quite loud noise

Despite the loud noise, NutriBullet Pro is definitely worth the try because of its convenience and powerful engine. It is a perfect choice to make Indian spices and food with this blender. Click here to check price

3. KitchenAid KSB1575BU 5-Speed Diamond Blender (More than 2,200 ratings)

KitchenAid 5-speed is an ideal machine if you are looking for the best mixer grinder for Indian cooking in the USA to fit all your needs. The diamond blending system ensures a quick and efficient combination of all ingredients.

With its solid engine and stainless steel pads, KitchenAid KSB1575BU 5-Speed Diamond Blender has high quality and reliability, which generates a vortex for excellent mixing performance.

The blender has the diamond mixing system with 5 settings and an ice-crushing mode so that you can choose the most suitable mixing options possible.

The ingredients can be removed, purée, chop, liquefied and mixed as the way you want to. Also, what is unique about Kitchenaid is its Intelli-Speed Motor Control, which can content and keep the crushing power optimally to proceed ingredients.

The pitcher of the blender lets you proceed and store your ingredients safely because it is BPA free and durable. You will find cleaning this blender is simple since it is safe for dishwashers, as well as a clean touch surface with white LED lights, which can be easily cleaned after use.

With the engine of 670 watts, KitchenAid 5-Speed Diamond Blender manages to do almost all functions like making smoothies, crushing ice, making dips, salsas or salad dressings, or even grinding spices for Indian food can be used with this blender.

PROS

  • Easy to clean
  • 5 variable modes
  • Stainless steel blades and diamond system

CONS

  • The engine is a bit loud.

This blender may not be as powerful as the most expensive blenders but it can do almost the same thing. It is comparable with the most costly mixer and has worked better in some ways than the most expensive mixer. Click here to check price

4. Nutri Ninja Personal and Countertop Blender BL642 (More than 1,800 ratings)

Nutri Ninja is one of those manufacturers who make consumer mixers at a very affordable price as well as very high quality. One of its products is the Auto-iQ Nutri Ninja Blender Duo (BL642). The version was introduced a couple of years ago and is now well known among smoothie lovers because of its great features.

This is a powerful system that uses as a blender as well as a spice or coffee grinder.

Nutri Ninja offers three manual settings, with 5 unique Auto-IQ pre-set programs, which allows you to take all the options for mixing, pureeing, making smoothies and many more.

Auto-IQ Technology is an automatic one-touch system that works by the containers used and produced. With this technology, the blender can mix, activate pulses in a different pattern and take a break to produce excellent results.

This intelligent, automated program enables users to avoid the inconvenience when they have to stop the blender to shake or stir the stuck food in the blender. This ensures the perfect blend of all ingredients.

The 2HP, 1.200-Watt, 2.5 times more powerful motor of the Nutri Ninja Auto-IQ BL642 than an ordinary mixer, makes it easy for users to generate any fruit and vegetable nutrients.

Two sets of blades are provided by Nutri Ninja Auto-IQ BL642. The “Totally crushing” blades are useful for crushing ice to snow, while the assembly of Pro Extractor Blade cuts whole fruit, vegetables and seed efficiently. Therefore, you can totally make any Indian spices or dosa batter in the USA without any doubt.

PROS

  • Auto-IQ Technology
  • Safe for dishwasher

CONS

  • Quite noisy

The Auto-iQ BL642 Nutri Ninja Blender Duo is an impressive blender. Some of its characteristics can compete with top-class models on the market. It has a very reasonable price and can definitely do a great deal with its 1500 watt engine. However, this product has been discontinued from Amazon. You can choose Nutri Ninja Auto IQ Duo Blender BL641 to replace BL642, which is more appreciated by users than BL642. Click here to check price

5. NutriBullet Rx N17-1001 Blender (More than 1,700 ratings)

The NutriBullet Rx N17-1001 Blender is a worth considering option if you want to get the most nutrition from fruit and vegetables.

A 1700-watt engine has been mounted in the NutriBullet RX N17-1001 Blender. The blender offers a 30-ounce cup and a 1-liter jar, which make it easier for you to blend single on-the-go servings and bigger portions for the entire family.

What is more, a heating cycle for mixing hot soups and sauces is available on the RX N17-1001. Hence, all your Indian soup can be made perfectly with this blender. It also features hands-free SMART with a start/stop automatic feature for the good mixing in a blender.

The Nutribullet can be washed very quickly. Just rinse the blades with warm soapy water and let them dry naturally. The bottles and jar can be washed with warm soapy water in the dishwasher.

Using this blender is very easy as there is plenty of information on how to use it as well as a fast-start guide to make many different dishes with a 165-page recipe and food book.

NutriBullet Rx N17-1001 Blender is also a great option for those who are busy by using its hand-free operation since you can fill the pitcher, set it on the base and let it run during your other tasks.

PROS

  • Powerful 1700-watt motor
  • Heating cycle
  • Hands-free SMART operation with auto start/pause

CONS

  • Noisy

NutriBullet Rx is an excellent choice for users seeking to handle hardened vegetables, frozen fruit, and ice. Its hands-free operation and SouperBlast functionality are particularly impressive. It has a much lower price compared to other high-end blenders but with very similar features. Click here to check price

Use of Blender in South Indian Cooking

If you are an Indian then you know what cooking really feels like. Most of the western dishes can be easily cooked and baked whereas, on the other hand, Indian dishes need to be pre-made and then actually prepared on the day. There are so many different masalas and chutneys that you have to make on your own especially if you are not in India because you can’t find such spices anywhere else in the world. So the best way to prepare them is to get the best blender for South Indian Cooking.

In the past, Indian women had to use stones to crush the spices and to make batter but now they have come up with innovative ways to make their tasks easier. A blender is one of the most basic appliances that you will find in an Indian household because without it, it would be impossible to complete a dish and add that Indian taste to the overall meal.Blenders can be used for multiple reasons other than just making smoothies or crushing ice. You can use it to blend spices, mix stuff, and make batter and chutneys for your Indian meals. There are a number of great blenders in the market that you can invest in, in order to make your everyday kitchen tasks easier.

Uses of blender in South Indian Cooking

Uses of blender in South Indian Cooking

Blenders can be used for a number of reasons in a South Indian Kitchen. There are a whole bunch of uses but we are only going to highlight the most basic uses of all so let us look at ways in which you can use a blender for Indian cooking.

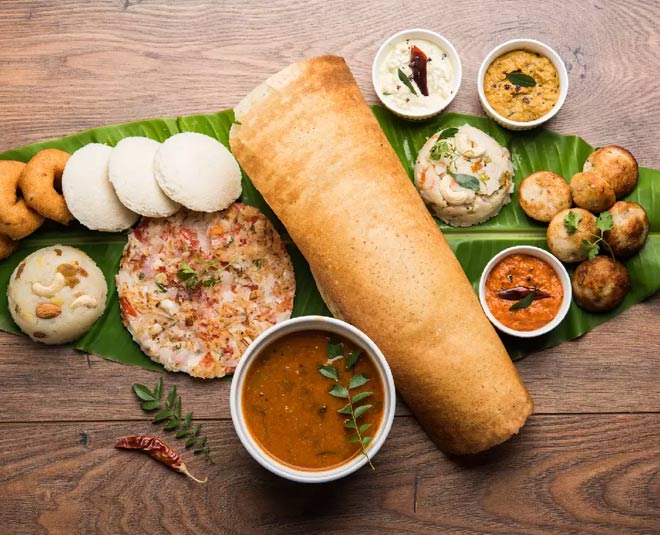
 The batter for Idli and Dosa 

If you are a South Indian then you would know that you need to make a lot of batter for Idli and Dosa and that is where the high-speed blenders come in. Instead of using stones to grind the mixture, simply add the mixture to the blender and you will have the perfect batter within seconds for your meal. 

 Chutney and sauces 

Chutneys and sauces are an essential part of South Indian meals. Normally it is very time-consuming and hard to make these sauces but with the help of the blenders, you can easily make them within seconds. All you have to do is choose the right ingredients and the settings and your chutney would be done in no time.

 Ice creams 

The best part about the blender is that you can also make smooth and fresh ice creams in it. The blades inside the jar blend all the ingredients perfectly so that no chunks are left behind and give you a smooth consistency of the ice cream which you can freeze and enjoy later.

 Instant Soups 

Most high tech blenders come with soup cycles. This feature allows you to instantly convert frozen ingredients into hot mixtures. All you have to do is add the ingredients, choose the soup cycles, set the speed and wait for at least 6 minutes and you will have a soup for yourself.

 Powder and Masalas 

The best advantage of blenders is that you can easily convert your fibrous spices into a powdered form so that you can use it easily in your food anytime. A strong blender will convert your tough vegetable spices, seeds, and nuts into a powdered form which you can mix in the same blender to form masalas of your choice.

 Fresh/ Frozen Drinks 

We all know that the blenders are perfect for making smoothies. One can’t blend the ingredients properly with their hand whereas the blender, on the other hand, can easily blend in all the ingredients at once and give you the perfect chilled smoothie.

 Desserts 

Most Indian desserts require jaggery and blending it with the hand is one of the toughest tasks but not anymore with the blender. You can easily blend the jaggery in the blender and add it to your desserts.

Things to consider when buying the best blender for South Indian Cooking

Finding the right blender for your household can be a tough task. You need to find something that will fulfill all your needs and will provide you with all the features that you need in order to carry out your everyday tasks. A few of the things that you need to consider before buying the best blender for south Indian cooking are:

 Hand or countertop 

You can get both, an immersion blender which is commonly known as a hand blender, or a countertop blender for your home. It all depends on the type of task that you will be performing with the help of the blender. If you have to blend a number of things then a countertop blender is the best choice whereas if you just want it for small tasks then a hand blender would be perfect as well.

 Material 

Blenders are available in different materials as well. You can find stainless steel blenders on one hand and plastic blenders on the other. Plastic blenders are lightweight and require less maintenance whereas stainless steel blenders, on the other hand, can easily be cleaned and are more durable than plastic blenders. So it all depends on the type of material that you want your blender to be in.

 Power range 

The power of the blender is determined by the power of its motor. The more powerful the blender is, the more easily it can blend tough ingredients whereas if you have low powered blenders then you can only use them for pureeing baby food or making smoothies. For example, even the best 12 Volt blender might not be perfect for mixing Indian spices.

 Space and size 

The size of the blender determines the space that it would occupy on the counter. The size of the blender also affects the fact of whether it can be stored in kitchen cabinets or not. So purchase a blender that is neither too small nor too big for your kitchen and easily fits on your counter or in your cabinets. 

 Price 

The prices of the blenders vary from manufacturer to manufacturer. Also, it depends on the number of features or the pieces that the blender comes with. So, determine your budget and see if the blender that you have chosen falls within your budget or not because you can even find a smoothie blender under $50. Remember you can always find cheaper alternatives.

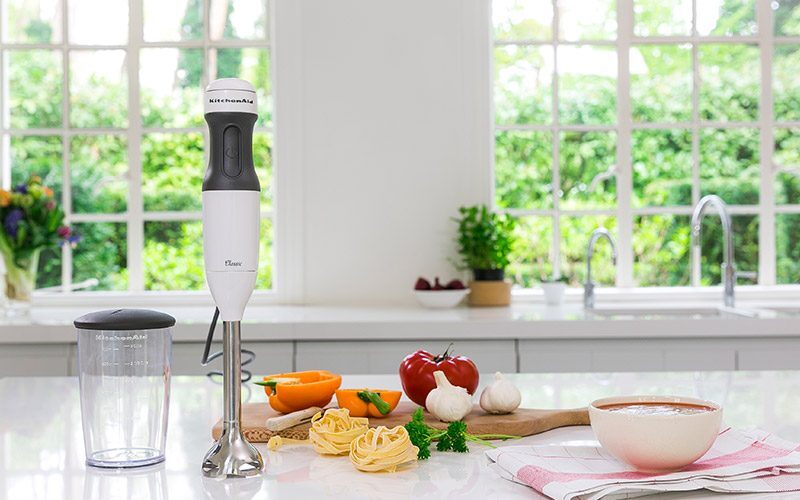
Superb Ways to Use Hand Blender

If you’ve followed Life As A Strawberry for awhile, you may have noticed this handy dandy little hand blender pops up in about a zillion recipes. I use it for EVERYTHING.

Still, I get asked pretty frequently whether an immersion blender is really worth it.

This post contains affiliate links, which means if you choose to purchase something I will earn a small commission at no additional cost to you.

If you’ve followed Life As A Strawberry for awhile, you may have noticed this handy dandy little hand blender pops up in about a zillion recipes. I use it for EVERYTHING.

Still, I get asked pretty frequently whether an immersion blender is really worth it.

My short answer? YES. A THOUSAND TIMES YES.

Here’s why:

Immersion blenders are compact. My hand blender takes up almost NO space – it’s small and fits just about anywhere, which makes it PERFECT for my tiny apartment kitchen.

They’re relatively cheap. You can get a good immersion blender for under $40 – try finding a high-quality food processor for that price! (Spoiler alert: you can’t).

They’re versatile. When I try to talk people into buying immersion blenders (my version of appropriate dinner conversation) the most frequent hesitation is “but I don’t make soup that much.” WHAT?! You guys – these hand blenders can do SO much more than soup. (And I’m going to show you just how much more in just a lil’ bit!)

They’re fast. It takes all of 30 seconds to make some of these recipes. SO SPEEDY. I love it.

They cut down on cleanup. The greatest thing to me about using an immersion blender instead of a bigger appliance is that I’m left with hardly any cleanup. (Cleaning = the worst). Just clean the blender piece and whatever bowl or pot you blended your creation in, and you’re wham-bam-donezo.

Immersion blenders are amazing, but I find they’re even more amazing when I make sure to follow a few general tips:

Wash it as soon as possible. The blade of the immersion blender has lots of hard-to-reach spots, and if you let it sit for too long it can be hard to clean it completely. As soon as I finish blending something, I run the metal piece of my hand blender under VERY hot water and give it a gentle scrub with a soaped-up sponge.

Blend in bigger quantities. Immersion blenders work best when there’s a lot of blend-able stuff to work with. Avoid small quantities and shallow dishes – for best results, you want the head of the immersion blender to be fully submerged in whatever it’s blending. (If I’m making a small batch of something, I like to use the plastic beaker that comes with the blender!)

Move it aroundMove the blender around for best results – when I’m using the plastic beaker, I move the blender up and down as it blends so that it picks up everything and blends evenly. If I’m blending a big pot of soup, I move the blender in a slow stirring motion so I don’t miss any big pieces!

Let hot dishes cool before blending. When you’re making soups or other hot blended dishes, remove the pot from the heat and let cool for 10-20 minutes before you blend anything. Things can spatter occasionally when using a hand blender, and getting hit with a drop of boiling hot soup is never any fun.

10 WAYS TO USE YOUR IMMERSION BLENDER

1. SALSA

Immersion blender salsa is my new favorite thing. I love salsa, but I’m really not a big chunky food fan, so blending a smooth salsa with a hand blender is the perfect solution for me.

Throw some tomatoes, onion, garlic, jalapeño, cilantro, salt and pepper in a tall narrow dish (I used the beaker that came with my hand blender!) and move the immersion blender up and down while you blend until you have a smooth salsa.

TIP: Put the tomatoes on top in the beaker – they’re easier for the blender to break down and will add some liquid to the salsa so the other ingredients blend more quickly!

10 Ways to Use Your Immersion Blender - Your hand blender is one of the handiest tools in your kitchen! Here are 10 creative ways to use your stick blender for simple, creative recipes.

2. PESTO

My immersion blender has me like “PRESTO, PESTO!” (annnd…it’s the best-o? FINE, I’LL STOP).

Now, the food processor gets alllll the attention when it comes to pesto-making, but honestly? An immersion blender works just as well for me. Just toss some fresh basil leaves, garlic, salt and pepper into a tall dish (plastic beaker for the win! Also, I just love saying the word “beaker”) and stream in a bit of olive oil. Blend with the immersion blender (use that up-down-up-down motion we talked about) until you have a smooth pesto. Sub arugula, parsley, cilantro, or even spinach for the basil to give your hand blender pesto a fun twist.

10 Ways to Use Your Immersion Blender - Your hand blender is one of the handiest tools in your kitchen! Here are 10 creative ways to use your stick blender for simple, creative recipes.

3. PANCAKE AND WAFFLE BATTER

WHAT?! AN EASIER WAY TO MAKE WAFFLES?! (Somewhere, Leslie Knope is jumping for joy. She gets it).

This was a major “DUH” moment for me and my immersion blender. The plastic beaker has a built-in spout, is the perfect size for a breakfast’s worth of pancake batter, and it takes all of five seconds to mix everything up lump-free. In short, everyone should be making their pancakes and waffles the hand blender way.

Just toss the ingredients for your favorite pancake batter into the trusty ol’ beaker and up-down-up-down blend away until you have a smooth batter. Pour the batter directly from the beaker onto a hot griddle or waffle maker, and voilà! Breakfast time, anytime.

4. SMOOTHIES

Another immersion blender breakfast breakthrough! Using a full-on blender for my one single breakfast smoothie always felt like such a waste to me – it took too many dishes and the cleanup just wasn’t worth it. Enter the immersion blender smoothie!

I toss some frozen fruit and yogurt cubes into the beaker (YAY FOR THE BEAKER), add just enough juice to cover all the fruit, and up-down-up-down blend away until I have a smoothie. I wash off the immersion blender, stick a straw right in the beaker, and BOOM! Smoothie heaven with minimal dishes.

5. CHEESE SAUCE

One of my favorite things about my immersion blender is its ability to save sauces that aren’t looking so hot.

Take mac and cheese sauce, for example: if your cheese doesn’t melt properly, you can end up with a weird, goopy, unappetizing sauce. But hit any lumpy sauce with an immersion blender for just a few seconds and you can bring that sauce back to smooth, cheese-y, delicious life!

6. SOUP

This one might venture a bit into “stating-the-obvious” territory – but even though I use my immersion blender in a ton of different ways, making creamy, delicious soup is by far my hand blender’s most frequent culinary adventure. So we couldn’t just leave it off the list! I much prefer smooth, velvety soups to chunky stews, and when wintertime hits I use my immersion blender a few times a week to whip up quick soups.

7. HOMEMADE TOMATO SAUCE

Homemade tomato sauce is SO. EASY. Especially when we’re talking about immersion blender tomato sauce! We pick a TON of tomatoes during the summer, and I like to turn the bulk of them into tasty tomato sauce that we can use all year round. It’s better (and more fun!) than the canned stuff you find at the store.

I always hear people talk about how important it is to peeeeeel the tomatoes and then seeeeeed the tomatoes and blah, blah, blah when you’re making tomato sauce.

But, umm…I do none of those things. One, because I’m ultra-lazy, and two, because I honestly don’t notice any difference in taste or texture when I take those extra steps.

Here’s what I do:

Wash the tomatoes (I like to use Roma tomatoes, but use whatever you’ve got!).
Quarter or halve them so they’re all about the same size.
Fill a pot with the tomatoes.
Put that pot over medium heat and cook for an hour or so until tomatoes have reduced.
Remove pot from heat and let cool 10-15 minutes.
Immersion blend the tomatoes.
BOOM.
DONE.

8. HOLLANDAISE SAUCE

It’s no secret that I’ve been on a major eggs benedict kick lately, and you may have noticed that each of those recipes has instructions for an immersion blender hollandaise sauce. It is SO EASY to make your own hollandaise, and the immersion blender hollandaise method takes a seemingly complicated dish like Eggs Benedict and makes it quick and easy.

To make your own hand blender hollandaise, add two egg yolks with a splash of lemon juice and a pinch of salt to your beaker (BEAKER!). Blend until eggs have lightened in color and thickened slightly, about 10 seconds with our trusty hand blender. Melt 1 stick of butter (it should be quite hot) and stream the butter into the egg yolks while blending until you have a smooth hollandaise sauce. Pour it over a poached egg atop a toasted English muffin, and then do a happy dance because you totally just won at brunch ??.

9. WHIPPED CREAM

This was another major, MAJOR a-ha! moment for me and my hand blender. Immersion blender whipped cream! Ready in under 30 seconds! Amazing. AMAZING!

Add a tablespoon or so of powdered sugar and about 1/2 cup of heavy cream to our trusty beaker. Up-down-up-down immersion blend for 10-15 seconds until cream has stiffened and looks, well, like whipped cream.

8 Reasons to Buy an Immersion Blender

Save time and energy with this handy immersion blender that makes daily recipes like sauces and smoothies effortless tasks when you are in a hurry. Your standard blender and food processor will be jealous.

immersion blender

If you are in search of a multi-use, compact, easy-to-clean gadget that will make your life in the kitchen way easier on a daily basis, look no further than an immersion blender. This portable handheld blender with a single rotary blade (also known as a hand blender or stick blender) expedites the process of beating, emulsifying, puréeing, or whipping ingredients together.

Rather than manually whisking for minutes on end, you can accomplish the same results much quicker. Have you ever tried to make from-scratch whipped cream without pulling out a mixer? It takes more willpower, muscle power, and dedication than you might think.Forget finicky, tough-to-clean food processors and all of their attachments that always find a way to go missing. The bottom attachment of the blender seamlessly pops off for a simple, easy cleaning experience.

In short, the core benefit of owning an immersion blender is that it makes prepping base, multipurpose recipes for the week seamlessly simple, and keeps you from dragging out (and later, cleaning up) your bulkier kitchen appliances to get the job done.

ways to put the immersion blender to work:

1. Tomato Sauce

Once your tomatoes have simmered to a soft consistency, use the immersion blender to break down the tomatoes into a thick sauce. Toss in a handful of freshly chopped basil, add your meatballs, or use the smooth sauce for a huge pan of lasagna. Freeze the leftovers, and pull it out on a busy weeknight when dinner needs to be on the table with little complication.

2. Whipped Cream

Top off your morning parfait or evening dessert with a fresh dollop of whipped cream. The blade incorporates the air more effectively if you use a tall container (usually the blenders come with beakers) to blend in. If you have powdered sugar on hand, fold in a scoop for a little sweetness and a tiny splash of vanilla extract for depth.

3. Hollandaise Sauce

Hollandaise sauce can be tricky to make. You run the risk of breaking the sauce or unintentionally cooking the eggs. Don’t be intimidated—you can do this. The best method is to beat the eggs, lemon juice, and water with the hand blender and slowly add in melted butter into the egg mixture. The slow pouring action allows the butter to emulsify with the eggs, without scrambling them, for a smooth and creamy sauce. Once you master this simple trick, you can make restaurant-worthy eggs benedict at home with ease.

4. Soup

Roasted squash or cauliflower turns into smooth, rich soups effortlessly with a whirl of the immersion blender. Pour in warm broth/stock or water to control the thickness of your soup. I always like to roast garlic cloves and onions slices along with my main veggies and blend everything together at once.

5. Pesto

Leave your clunky food processor on the shelf, and whip out your immersion blender to make pesto sauce in no time. Spread it on a sandwich, toss it with pasta, spoon over chicken quarters, or use it on pizza. Feel free to swap the pine nuts (they’re pricey) with pecans, walnuts, almonds, pisctachios, or whatever nut you have on hand.

6. Milkshakes and Smoothies

Start your day with a produce-packed smoothie or treat yourself after dinner to a decadent shake, both of which can be conveniently whipped up with an immersion blender. Note, using the immersion blender for these beverages is best when you only need to make one milkshake or smoothie for yourself (especially during busy mornings when you are rushing out the door).

7. Mayo

Skip the shelf-stable mayo impersonators at the store, and opt to make the real deal at home instead. Mayo is an emulsification of egg yolks and oil, however these ingredients do not bind together easily, so an immersion blender is extremely helpful. You can do this by hand… but it’s well worth it to give your biceps a break, and let the blender do all the work. As the eggs beat, slowly drizzling the oil in is key. The mayo will soon start to take shape, and the closer you are to making a smoked turkey club sandwich.

8. Vinaigrettes

Who needs store bought dressings and vinaigrettes when you can make your favorites within minutes at home for half the cost? Blend a combination of olive oil, honey, and vinegar (balsamic, red wine, and rice wine all work just the same) or olive oil, honey, and lemon juice with a pinch of salt and you’ve got the base of your own vinaigrette, ready for further customization with herbs and seasonings.

Best Food Processor For Indian Cooking

Food processors are essential kitchen appliances that save your time and effort in the kitchen and enable you to chop, mix, slice, and juice ingredients in a few seconds. Investing in the best food processor can be a wise decision as it makes your cooking experience smooth, enjoyable, and efficient.

To help you make the right choice, we list some of the best food processors in this post. Before you get to the list, check out the types of food processors available.

Types Of Food Processors

There are different types of food processors for varied needs. Figure out what you need, and then decide.

  1. Manual processor or hand-operated processor is the most basic type. It is small, doesn’t require electricity, and needs little space in the kitchen. From chopping to slicing and juicing, it can perform various kitchen chores with ease.
  2. Mini food processor is a small-sized processor to help you with the daily chores of chopping and slicing. It works on electricity and is best suited for small families.
  3. Full-sized processors are smart and relatively big appliances. They have a capacity of seven to eight cups and are expensive yet highly durable than the other types.

11 Best Food Processors For Indian Cooking

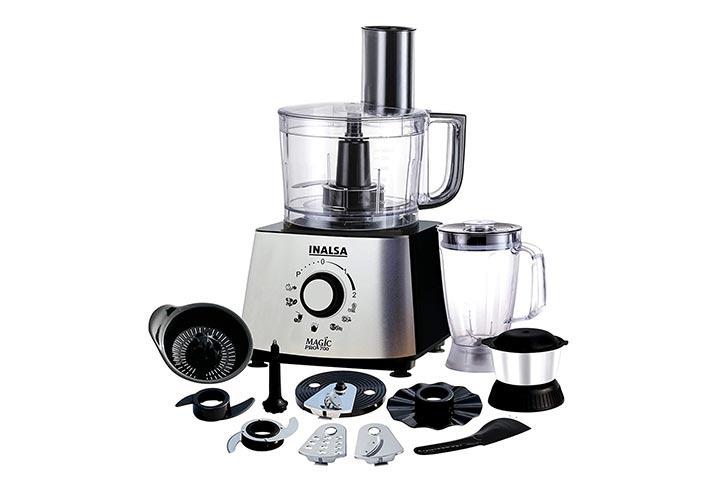
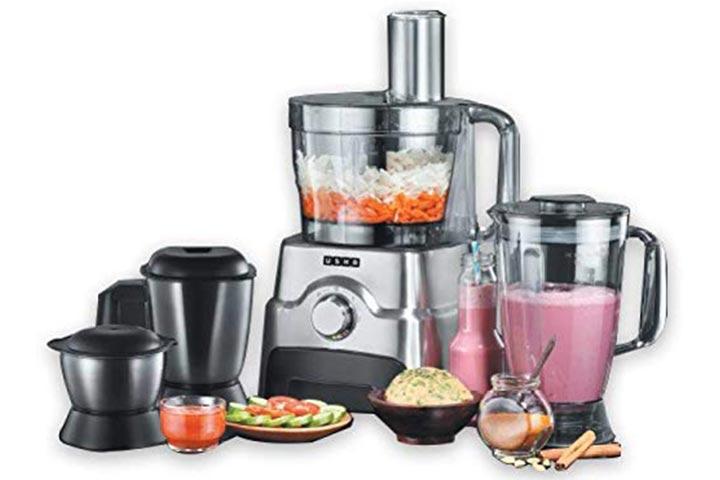
1. Inalsa Food Processor

Inalsa Food Processor

Powered with an 800w motor, the Inalsa food processor can make your processing more efficient. It has more than 50 functions to help you chop, shred, emulsify, knead, and much more. The processor has high-quality, stainless steel jars to give you a power-packed performance. Its main bowl has a 1.4l capacity, ideal for a big family. You get a two-speed setting to choose from.

Pros

  • Premium quality and long-lasting
  • BPA-free, break-resistant, and multipurpose jars
  • Blender and dry grinding jar included
  • Powerful motor with anti-skid feet
  • Whisker, spatula, cutter holder, and blade included

Cons

  • Jars may leak or be prone to cracks
  • Switch knob may loosen with time

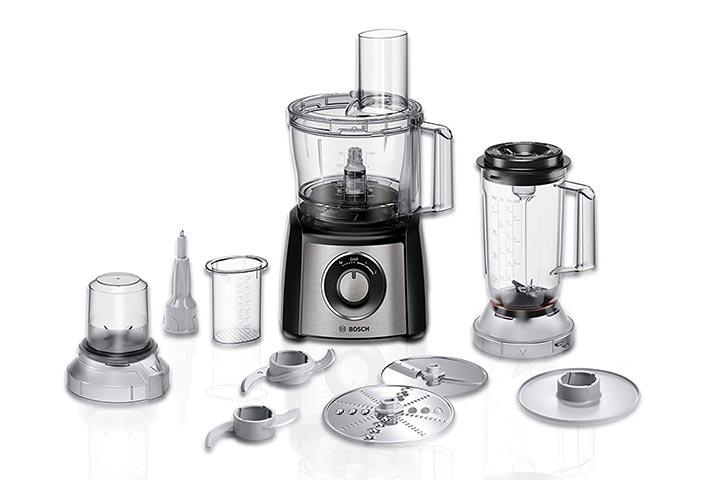
2. Bosch Lifestyle Food Processor

Bosch Lifestyle Food Processor

The Bosch processor has dishwasher-safe accessories and works on an 800w motor with 20 to 240v operating voltage. It has various accessories, including a plastic mixing bowl, plastic blender attachment, reversible shredding disc, beating disc, reversible slicing disc, universal knife, universal shredder, accessory carrier, and plastic dough tool. The processor has more than 50 functions to cut, chop, grate, grind, and knead the dough.

Pros

  • Rubber suction feet to prevent slipping
  • Easy to clean and use
  • Cable storage compartment
  • Multifunctional and durable
  • Multilevel six knives with three double blades

Cons

  • Nut chopper may stop working after a few days

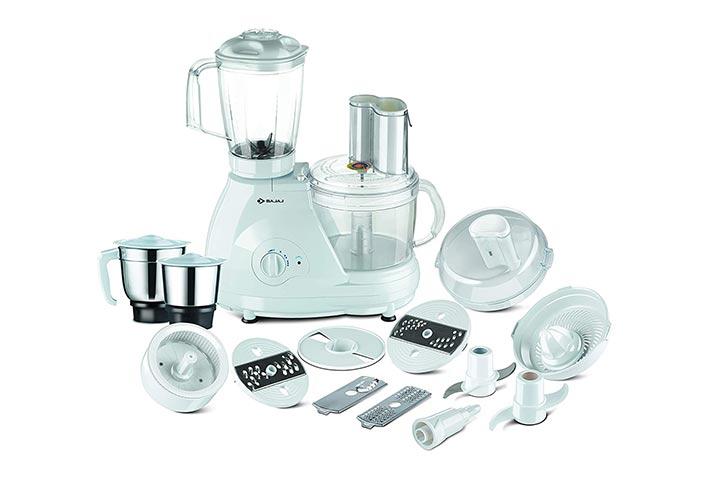
3. Bajaj Food Processor

Bajaj Food Processor

The Bajaj food processor has a locking mechanism, offering hassle-free operation without leaking out the ingredients. It has an unbreakable polycarbonate bowl and liquidizing jar for the long-term experience. The mixer grinder has a three-speed control, a two-year warranty on the full product, and five years on the motor.

Pros

  • Powerful kneading blade
  • Sturdy 600w motor
  • Made of high-quality stainless steel
  • Additional pulse function for an extra boost to power
  • In-built lock mechanism for safety

Cons

  • Could be noisy
  • Too many parts to handle

4. Usha Food Processor

Usha Food Processor

Usha’s food processor is crafted to perform 12 different applications and has a 100% copper motor. It works smoothly on a 1000w motor at 230v, with a frequency of 50hz. You get both citrus and centrifugal juicing attachment with overload protection for motor safety. It comes with three impact-resistant jars and a processing bowl for added convenience.

Pros

  • In-built storage drawer for blades and discs
  • Premium black finish
  • Dough kneading jar included
  • Easy to assemble accessories

Cons

  • May get rough after some time
  • Could be noisy
  • Juicer attachment may not be smooth

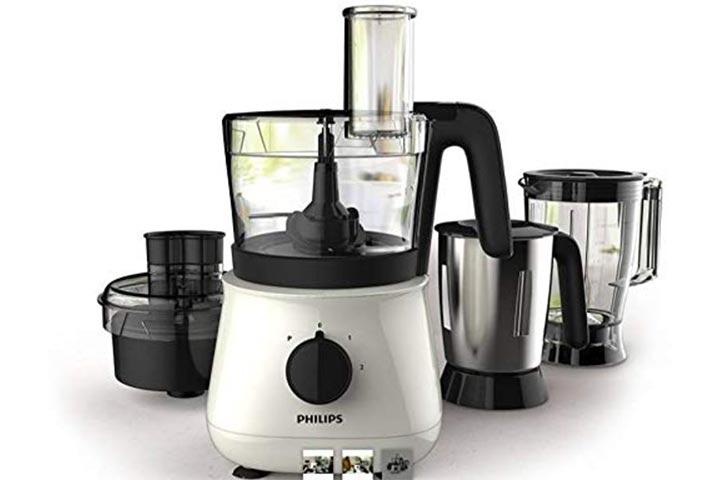
5. Philips Food Processor

Philips Food Processor

The compact food processor comes with a blender and a churning jar. Preparing shakes, smoothies, mint chutney, or kneading the dough, you can make various dishes with this processor. It operates on power-chop technology, which lets you chop your vegetables with ease and finesse. You get different jars in the set that makes your kitchen work manageable, faster, and mess-free.

Pros

  • Powerful 700w motor
  • Compact design makes it easy to stack
  • Two-speed settings and pulse for maximum control
  • Dishwasher-safe parts
  • Easy-to-assemble accessories

Cons

  • Power base may not work efficiently
  • Maybe prone to cracking

Cool Uses Of Food Processor in Indian Cooking

Food Processor Cooking

The food processor is an indispensable part of our kitchen, and I love Indian food, but it occurred to me I’ve never explored the uses of food processor in Indian cooking before. So I decided to investigate.

Here’s what I uncovered:

A food processor is a GREAT addition if you love Indian cooking. From grinding meat, making chutney, chopping nuts, whole spices, or coconut flakes, puréeing sauces & even making dough for naan, chapati, roti, or paratha. You will quickly wonder how you ever did without one of these amazing machines!

10 Cool Uses of a Food Processor in Indian Cooking

1. Dough for naan bread 

Indian bread, whether it’s naan, chapati, roti, paratha or another variety, are an essential part of Indian food and cooking. You’ll be amazed at just how easy it is to make your own bread dough with your food processor. I have a great recipe down below.

2. Tamarind & mint/cilantro chutneys 

I love using chutneys as a condiment or even just to dress greens for a salad.

Tamarind is the dark-brown, almost raisin-like chutney that is very common. But you often see a green chutney as well which can be cilantro, mint, or both.

Puréeing in a food processor, along with chopped nuts and/or coconut flakes, maybe some plain yogurt and water make creating your own chutneys quick and easy! Check out one of my favorite recipes below.

3. Making kofta

You’ll see lamb or perhaps chicken kofta all across the Middle East.

In India, while not exclusively, these are often vegetarian. The most common method of making these vegetarian meatballs is by blending potato and paneer cheese, cornstarch, and often adding ground cashews.

So your electric food processor works great to blend all of that up and then simply form into meatballs and fry.

4. Churning butter to make ghee

Ghee is just clarified butter and it’s the cornerstone of Indian food.

While you can buy ghee (not refrigerated usually) at the grocery store, it’s often expensive. Instead, make your own! Just pour heavy cream into your food processor (with a pinch of salt if you wish) and process for about 10 minutes and you’re done!

Then to clarify the butter to make ghee, simply heat the butter either in the oven or on a stove top for about 15 minutes on low heat.

It will foam, bubble, and then start to foam again, and then, usually around the 15-minute mark, it’s done.

Pour through a strainer or some cheesecloth to remove any solids and allow it to harden back and it’s ready to go. Refrigerate for longer shelf life, but even at room temperature, it will last a month.

5. Finely chopping spinach for Saag Paneer

Saag Paneer may well be my daughter’s favorite thing to eat when we go to our favorite Indian restaurant in Austin (Asiana).

Essentially, it’s a creamed spinach with large chunks of paneer cheese floating in it. Many recipes call for frozen spinach, but whether you use frozen or fresh, it works great to puree in your food processor until smooth.

Then you simply saute with some onion, garlic, freshly grated ginger and maybe a little bit of chile for some heat, eventually adding the spinach and some essential spices like cumin and coriander. Plain yogurt gives the spinach it’s creamy texture at the end.

6. Blending onion and tomato for a sauce base

LOTS of Indian sauces and curries start with a base of onion and tomato blended together.

Just dropping them into the food processor and blending until you get the smooth consistency you want is super easy! For some reason, a lot of Indian recipes don’t call for garlic, but I love it and add it to almost everything, so throw a few cloves in as well if you love it too.

7. Dicing potatoes or okra or other veggies

The dicing blade doesn’t work for all veggies (carrots can be challenging for some reason) but works great for potatoes, long beans, and things like okra, all of which work great in a variety of Indian recipes

8. Make your own curry paste

Curry paste is an essential ingredient in curry,

Make your own curry paste for Indian food quickly and easily in your food processor.

While there are MANY varieties of Indian curry pastes, the base of many is often onion, tomato, ginger, and garlic. So just start by puréeing all of them and adding the common spices like turmeric, cumin, and coriander.

9. Create amazing homemade soups

My friend Doug loves Indian soups! I’m a little weird in that I only really eat soup when it’s cold outside. That being said, Indian cuisine gives us some GREAT Indian soups.

Many just blend cooked lentils or garbanzo beans as the base. You’ll also hear the term Shorba, which can be a catch-all phrase used throughout the Middle East to describe a variety of types of soups.

Mulligatawny is probably the most widely known type of Indian soup probably due in large part to The British making modifications during their colonization period of India.  But no matter what the base for your Indian soup recipes, blending in your food processor is a sinch!

10. Make your own garam masala spice blend

Garam masala is a spice blend used extensively in Indian food. Often (but not always), it’s sprinkled on top of a finished dish rather than cooked with it the whole time.

You would typically start by toasting whole coriander, cumin, fennel, and cardamom seeds, along with whole cloves, a small amount of nutmeg and peppercorns.

Add a small amount of chili powder for heat if you wish. Toast in a dry skillet over low heat. I would not toast anything where you’re using a ground spice; just the whole pieces.

Then simply transfer to your food processor and blend until smooth. For a larger sized food processor, this works best with a large batch. Otherwise, you might use a clean coffee blade grinder.

Design a site like this with WordPress.com
Get started